Export to Excel functionality using the Wizard technique
Recently, we were working on a requirement wherein the client wanted an “Export to Excel” button on a Visualforce page which displays the data in a tabular format. Clicking this button enables them to store the tabular data locally as an excel file. Admittedly, there are several ways to implement this functionality. We will walkthrough an implementation technique that I like to call the “Wizard technique”.
Let’s create a sample Visualforce page(AccountDataTable.page) with a list of Account records displayed in a <apex:pageBlockTable> component.
# AccountDataTable.page
<apex:page controller="AccountDataController" tabStyle="Account">
  <apex:pageBlock title="Account Data Table">
    <apex:pageBlockTable value="{!accounts}" var="account">
      <apex:column value="{!account.id}"/>
      <apex:column value="{!account.name}"/>
      <apex:column value="{!account.description}"/>
      <apex:column value="{!account.SLA__c}"/>
      <apex:column value="{!account.Active__c}"/>
    </apex:pageBlockTable>
  </apex:pageBlock>
</apex:page>
The controller code is as follows:
public with sharing class AccountDataController {
  //constructor
  public AccountDataController() {
  }

  //list of accounts
  public List<Account> accounts {
    get {
      if(accounts != null) {
        return accounts;
      } else {
        accounts = [Select Id, name, Active__c, SLA__c, Description from Account limit 10];
        return accounts;
      }
    }
    set;
  }
}
The Account data table looks like this in my sandbox.
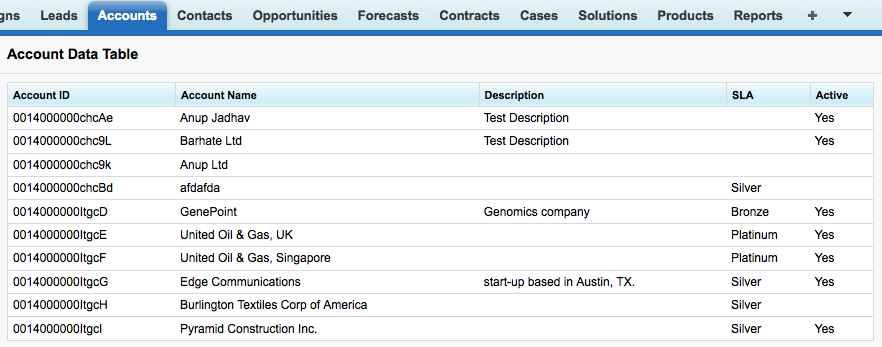
Now, let’s create another Visualforce page(AccountDataExcel) with the contentType attribute set to application/vnd.ms-excel#AccountTable.xls. This Visualforce page is linked to the AccountDataController.cls controller that we have used in the AccountDataTable.page.
# AccountDataExcel.page
<apex:page controller="AccountDataController" contentType="application/vnd.ms-excel#AccountTable.xls" showHeader="false" standardStylesheets="false">
  <apex:pageBlock >
    <apex:dataTable value="{!accounts}" var="account">
      <apex:column value="{!account.id}"/>
      <apex:column value="{!account.name}"/>
      <apex:column value="{!account.description}"/>
      <apex:column value="{!account.SLA__c}"/>
      <apex:column value="{!account.Active__c}"/>
   </apex:dataTable>
 </apex:pageBlock>
</apex:page>
There are 2 things to note in this Visualforce page. First, I’m using <apex:dataTable> instead of <apex:pageBlockTable>. The reason being that the generated excel file includes some javascript code at the top along with the data. Replacing <apex:pageBlockTable> with the <apex:dataTable> resolved this issue(not sure why), and removed the javascript code from the excel file. Second thing to note is the showHeader and standardStyleSheets attribute in the <apex:page> component is set to false. The contentType attribute is responsible for transforming this page into an excel file.
We are now ready to add the “Export to Excel” button to the AccountData.page as follows:
# AccountDataController.cls
# export to excel - returns a page reference to the AccountDataExcel page

public PageReference exportToExcel() {
   return Page.AccountDataExcel;
 }
And here’s the Account data table with the export to excel button.
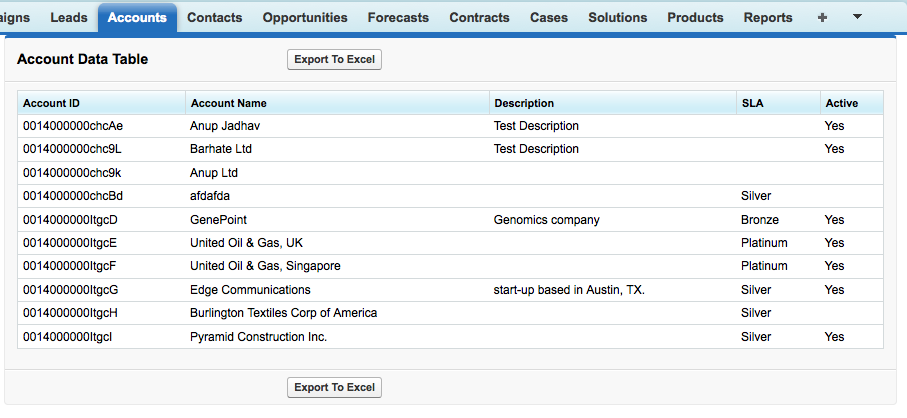
And voila! When you click the button, your browser will download the data in an excel file. I call this method the Wizard technique because it mirrors the pattern(more than one Visualforce page linked to the same controller) used to create a wizard based form on the Force.com platform.
Tweetcomments powered by Disqus